FAQs
Have a look at what is going on in the world of heating.
General
How can I order products of your company?
Distribution of our products takes place only through our business partners, where they will happily advise and present you with a quotation. Ordering directly from the factory is not possible. We, as a manufacturer, do not supply directly to end clients. The delivery terms upon previous ordering by our business partner range from 2 to 4 weeks, depending on the type of product.
How do I choose a suitable radiator?
To select a suitable radiator you need to ask a few simple questions.
- What heat output do I need?
- The requested heat output corresponds always to the actual heat loss of the room
- The heat loss calculation is given in the project documentation of the heating system
- In what environment do I want the radiator to be installed?
- Dry or humid environment
- Spatial limits (length, height, depth, location of the thermostatic head)
- Permanently tempered room or intermittently heated facility
- What do I expect from the radiators?
- Efficiency
- Design
- Drying function
- Price
Based on your requirements you can then choose from the four main ranges of our products:
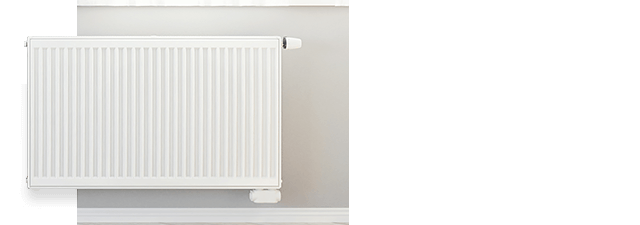
- Panel radiators RADIK
- They are divided according to the location of the connection (side or bottom)
- They are divided according to the appearance of the front panel (profiled, flat, flat with fine grooves)
- With integrated valve versus without integrated valve
- Horizontal vs. vertical
- Complementary assortment is a drier
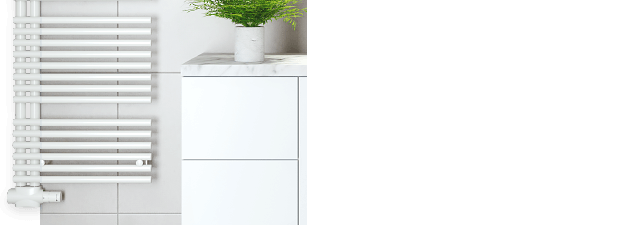
- Towel rail radiators KORALUX
- 5 basic models differing in diameter and axial spacing of the horizontal tubes
- Complementary assortment is a drier and a hanger
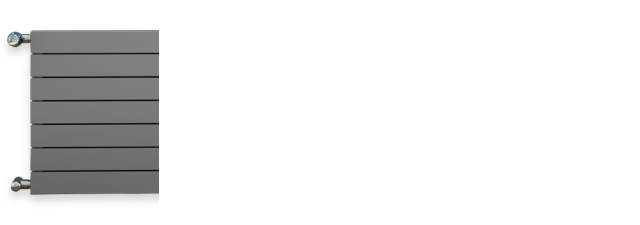
- Design radiators KORATHERM
- Horizontal vs. vertical
- Complementary assortment is a drier and a hanger
- Convectors
- With fan vs. without fan
- Divided by the installation "location": in the floor, on the floor, wall-mounted, on the façade or in atypical space
Can power-matching radiators be designed on the basis of the dimensions of the room?
Sizing the radiators on the basis of the internal volumes of the rooms was very popular in the past because it was a very simple calculation but, unfortunately, very inaccurate in retrospect. Therefore, we recommend that the project of the heating system is taken as the basis, since it clearly identifies the heat losses of each room and the temperature gradient of the heating system, based on which we are able to offer you power-equivalent radiators.
How to determine the heat output for a different temperature gradient?
The power of each radiator varies depending on the temperature gradient.
According to the standard EN 442 (Radiators), the thermal power must be measured in an independent accredited laboratory for temperature gradient of 167/149/68 °F. This means that the inlet cooling medium into the radiator has the temperature of 167 °F, the outlet heat transfer medium from the radiator has the temperature of 149 °F under the design air temperature of 68 °F in the heated space.
If those temperatures change, heat output of the unit will change, too. For this reason, we offer in our catalogues power outputs of radiators always for several commonly used temperature gradients (194/158/68, 167/149/68, 158/131/68, 131/113/68). If you use a different temperature gradient than the one shown in our materials, you can use our interactive configurators, that allow you to convert the power outputs for any temperature gradient.
Can I use your radiators in a heating system with a gravity feed circuit?
RADIK - YES, but only the following types: KLASIK, KLASIK – R, KLASIK – Z, PLAN KLASIK, PLAN KLASIK – R, LINE KLASIK, LINE KLASIK – R, HYGIENE, CLEAN
KORALUX - YES
KORATHERM - NO
CONVECTORS - NO
What is your tip regarding connecting your radiators to a system with forced circuit in the perspective of the fittings used?
We recommend that you connect the radiator so as to enable the fitting to:
- control the flow of the heating fluid
- be able to close on both the inlet and outlet
- control the temperature of air in the room that is being heated
Important for practice - the recommended use of the fittings:
1 Inlet water pipe:
- thermostatic valve with a pre-set flow rate, possibly with a fixed flow rate constant + thermostatic head
- thermostatic valve can be integrated in connecting fitting (HM fitting)
2 Outlet water pipe:
- screw union at least a sealing function (radiator shut down, heating system in operation))
- screw union also with regulatory function or the possibility of draining and filling the radiator (special tool must be used)
- Screw union with the respective functions may be integrated into the connecting fitting ("H” fitting - inlet and outlet water manifold, usually with a pitch of 50 mm)
This recommendation is based on the requirements of the Decree of the Ministry of Industry and Trade Coll No. 193/2007.
Quote of the Decree: Coll. 193/2007 Section 4,Part of Art. 1
"...Every radiator is equipped with a valve that can close and control and has a regulator to ensure local control and two-point connection, excluding one-pipe heating systems, and also with regulating screw union, unless it is a case by Section 7 par. 5”
Can heat meters (cost distributors) be used on your radiators?
 Using ratio meters on our radiators is possible and very common. KORADO, a.s. is however not a supplier of these systems, and so the way of measuring and installation of heat meters on radiators is the "know-how" of companies that produce these indicators. Therefore, please address you questions directly to the vendor of a concrete cost distributor.
If the surface finish of radiator gets disturbed mechanically or another way, the warranty for the surface finish and tightness of radiators on both sides of the plate which the meters are fixed to becomes void. The defined threshold for the loss of warranty is an area at a distance of 9 5/6" from the point of mechanical or thermal damage to the plate (weld spot, surface with coating removed in the preparation of the joint, etc.), and any other defect caused by such mechanical or other disturbance of the surface finish.
Is there a possibility to repair mechanical damage of the paint of radiators?
Correction paint - CRAMER

Use a brush to fix a minor damage to the painted surface of radiators. The correction procedure can be found in Instructions for Use stated on the paint packaging.
Ceramic enamel spray

The ceramic enamel spray is designed to repair minor damage to the painted surface of radiators. The correction procedure can be found in Instructions for Use stated on the paint packaging.
How can I clean the radiators?
Radiators with final surface finish can be cleaned using a suitable water-borne cleaning agents commonly used in households without any adverse impact on the painted surface. These agents must not be abrasive (due to abrading the paint surface), or strongly alkaline or acidic (chemically aggressive).
A simple method of maintaining the panel and design horizontal radiators is by means of a cleaning brush (Order No.: Z-D029). To use, it is not necessary to disassemble the grid or the side covers. The length of the cleaning brush is 44 2/3", the bristles are of animal origin (goat hair), the handle is wooden.
How to solve possible complaints KORADO a.s.’s products?
Are you able to produce atypical dimensions of your products?
Yes, but only floor convectors KORAFLEX. On our website you can find an interactive inquiry form for processing offers for atypical production. The possibility of producing your request will be evaluated by our technical department, then you will receive our quotation and, if you confirm your order, we will send you our drawings for written approval prior to the production. The delivery time will be determined individually based on the complexity of the technical solution, and will be counted from the moment of receiving a binding order. These products can be ordered exclusively through authorized KORADO dealers.
As concerns the rest of the products, this is not possible in terms of the established series production.
Steel Panel Radiators - RADIK
It is possible to order replacement sidewalls, grilles and accessories for fixing them?
For swift replacement of cast iron or steel radiators with a connecting pitch of 19 2/3", there is the RADIK KLASIK - R model. You can easily find the suitable size of the new radiator in this table. Here you will find an adequate size of the new radiator, provided that the parameters of the heating system or the building (insulation, new windows, etc.) do not change. When making structural changes of a greater extent, it is recommended that the heat losses of each room are re-calculated in order to avoid over-dimensioning of the radiators.
RADIK - What valves are used in panel radiators of VK design?
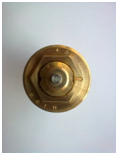
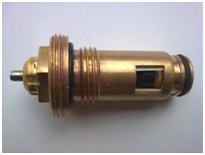
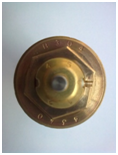
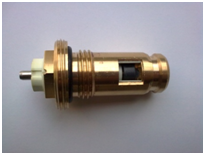
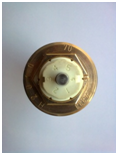
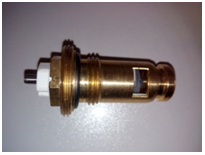
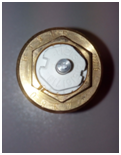
The HEIMEIER valve has always been used, as it is the European top in the region. Numeric designation is stamped on the face of the valve and can be subtracted after removing the manual or thermostat head. If you need to replace a control fitting (valve) in the radiator, it is imperative that the fitting (valve) is identified first by the stamped numbers and only then ordered. These fittings are in no way interchangeable with each other with the exception of 4333 and 4360, which may be interchanged.
|
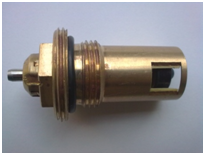
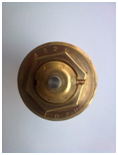
1. 1994 to 1997 - valve insert with thread M 22 x 1.5 and marking 4326 (Catalogue No.: Z-ND-004) |
 |
 |
|
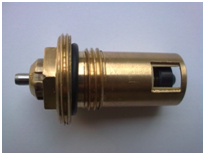
2. 1997 to 2000 - valve insert with thread G ½ and marking 4324 (Catalogue No.: Z-ND-005) |
 |
 |
|
3. 2000 to 2005 - incorporated valve with thread G ½ and marking 4340 (Catalogue No.: Z-ND-009) |
 |
 |
|
4. 2005 to 2015 - incorporated valve with thread G ½ and marking 4333 (Catalogue No.: Z-ND-015) (In models VKM and COMBI VK already since 4/2004). |
 |
 |
|
5. 2005 to 2015 - incorporated valve with thread G ½ and marking 4360 (Catalogue No.: Z-ND-057) |
 |
 |
How am I supposed to dismantle the upper grille and sidewalls in RADIK panel radiator?
For radiators made after 2011.
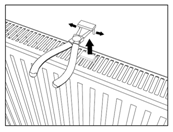
- First, you need snap out the top cover holder.
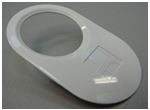
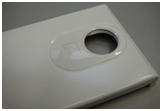
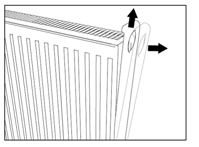
- Subsequently, remove the KORADO side cover.
- Slide the side cover first upward (tap the cover bottom with your hand) and then move it to the side (according to the arrows in the diagram).
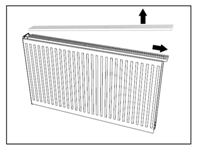
- It is now possible to move and remove the top cover of the radiator / grille.
For radiators made before 2011
Disassembly
- First it is necessary to grasp the side cover at the upper and lower opening and move it carefully (by about 1 mm) horizontally along the outlets away from after the radiator.
- Subsequently, lightly tap (with open hand) the lower edge of the sidewall upward (the sidewall moves 2 mm upwards).
- The side cover is again carefully moved horizontally along the outlets away from the radiator.
- This procedure is performed on the opposite sidewall, too.
- The upper grille has to be moved in the horizontal direction to one side, so that the grille is not overlapped on the other sidewall by the upper rounded edge of the sidewall. The end of the grille is gently lifted above the sidewall.
- The same is carried out with the other end of the grille.
- The grille is fixed in the radiator with a “J”-shaped plastic “hook”. It is necessary to look to know where, or at which sidewall of the radiator (front or rear) the “vertical leg” of this hook is located.
- Then the grille is carefully lifted vertically upwards (by max. 1/8") to be slowly rotated and lifted so that also the hook or, more precisely, its “vertical leg” is pulled simultaneously with the grille, and not in reverse! This will release the hook and dismantle the grill, too.
- The hook can now be taken out of the grille.
- It should be remembered, in which grille aperture the hook was located, and in which direction was oriented. The same applies to the grille.
Refitting
- The grille (without a hook) is placed on the radiator.
- The ends of the grille are gradually pushed beneath the rounded edges of the sidewalls.
- One hand positioned on the sidewall (at about half the height of the radiator) has to be gently pushed horizontally toward the heater and the other hand lightly "taps" (with open hand) the upper rounded edge of the sidewall downwards - the sidewall thus snaps in the outlets of the heater.
The grille is then fixed with the hook - the hook is inserted into the original hole. This takes place slightly skewed “along the tip” of the “J” letter, and only until the hook is fully inserted on the side of the tip, then it is pushed all the way on the side of the "leg”, too.
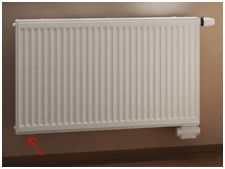
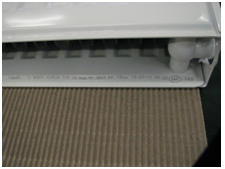
How can I unambiguously identify a RADIK radiator that I have at home?
Our panel radiator can be identified by printing, indicating the date and time of the manufacture, located at the bottom left on the rear side of the front panel of the radiator.
It is possible to order replacement sidewalls, grilles and accessories for fixing them?
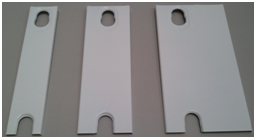
Yes, spare parts of panel radiators can be ordered separately (see below).
Analysis of the order code:
ex.: Z-BKN-22-300R
22 = type
300 = heigh in millimeters = 11 4/5 inches
Side covers for RADIK radiators produced after 2011
|
Side cover for RADIK |
|||
|
Height H (inch) |
TYPE 11, 20, 21 |
TYPE 22 |
TYPE 33 |
|
7 7/8 |
- |
Z-BKN-22-200R |
Z-BKN-33-200R |
|
11 4/5 |
Z-BKN-11-300R |
Z-BKN-22-300R |
Z-BKN-33-300R |
|
15 3/4 |
Z-BKN-11-400R |
Z-BKN-22-400R |
Z-BKN-33-400R |
|
19 2/3 |
Z-BKN-11-500R |
Z-BKN-22-500R |
Z-BKN-33-500R |
|
21 4/5 |
Z-BKN-11-554R |
Z-BKN-22-554R |
Z-BKN-33-554R |
|
23 5/8 |
Z-BKN-11-600R |
Z-BKN-22-600R |
Z-BKN-33-600R |
|
27 5/9 |
Z-BKN-11-700R |
Z-BKN-22-700R |
Z-BKN-33-700R |
|
35 3/7 |
Z-BKN-11-900R |
Z-BKN-22-900R |
Z-BKN-33-900R |
Analysis of the order code:
ex: Z-HK-22-040
22 = type
040 = height (in 400 mm) = 15 3/4 inches
Top covers/grilles for RADIK radiators produced after 2011
|
Upper cover RADIK |
|
|
|
|
Length L (inch) |
TYPE 11, 20, 21 |
TYPE 22 |
TYPE 33 |
|
15 3/4 |
Z-HK-11-040 |
Z-HK-22-040 |
Z-HK-33-040 |
|
19 2/3 |
Z-HK-11-050 |
Z-HK-22-050 |
Z-HK-33-050 |
|
23 5/8 |
Z-HK-11-060 |
Z-HK-22-060 |
Z-HK-33-060 |
|
27 5/9 |
Z-HK-11-070 |
Z-HK-22-070 |
Z-HK-33-070 |
|
31 1/2 |
Z-HK-11-080 |
Z-HK-22-080 |
Z-HK-33-080 |
|
35 3/7 |
Z-HK-11-090 |
Z-HK-22-090 |
Z-HK-33-090 |
|
39 3/8 |
Z-HK-11-100 |
Z-HK-22-100 |
Z-HK-33-100 |
|
43 1/3 |
Z-HK-11-110 |
Z-HK-22-110 |
Z-HK-33-110 |
|
47 1/4 |
Z-HK-11-120 |
Z-HK-22-120 |
Z-HK-33-120 |
|
55 1/8 |
Z-HK-11-140 |
Z-HK-22-140 |
Z-HK-33-140 |
|
63 |
Z-HK-11-160 |
Z-HK-22-160 |
Z-HK-33-160 |
|
70 6/7 |
Z-HK-11-180 |
Z-HK-22-180 |
Z-HK-33-180 |
|
78 3/4 |
Z-HK-11-200 |
Z-HK-22-200 |
Z-HK-33-200 |
|
90 5/9 |
Z-HK-11-230 |
Z-HK-22-230 |
Z-HK-33-230 |
|
102 1/3 |
Z-HK-11-260 |
Z-HK-22-260 |
Z-HK-33-260 |
|
118 1/9 |
Z-HK-11-300 |
Z-HK-22-300 |
Z-HK-33-300 |

Analysis of the order code:
ex.: Z-DHK-20
20 = type
RADIK top cover holders
|
Top cover holder |
|
|
|
Name |
Order No. |
|
|
RADIK top cover holder for type 11 |
Z-DHK-11 |
 |
|
RADIK top cover holder for type 20 type 21 – for H 19 2/3", 23 5/8", 35 3/7" |
Z-DHK-20 |
|
|
RADIK top cover holder for type 21 – for H 7 7/8", 11 4/5", 15 3/4", 21 4/5" |
Z-DHK-21 |
|
|
RADIK top cover holder for type 22 and 33 – for H 7 7/8", 11 4/5", 15 3/4, 21 4/5 |
Z-DHK-22 |
|
|
RADIK top cover holder for type 22 and 33 – for H 19 2/3", 23 5/8", 35 3/7" |
Z-DHK-22-2 |
|
|
RADIK top cover holder for type 22 and 33 - transparent |
Z-ND-038 |
 |
|
RADIK top cover holder for type 22 and 33 - white |
Z-ND-046 |
RADIK side cover holders

Side cover plastic lock: Z-ND-011.
For RADIK radiators made before 2011.

KORADO cap Z-ND-039.
For RADIK radiators made since 2011.
How to properly use the mounting template?
The mounting template can be used for all models of KORADO panel radiators with the bottom connection and a pitch of 2". The template consists of 2 essential parts - plate and connecting piece. For each of them there is a choice of two items:
Selecting the “plate”:
Depends on the model and type of fitted radiators.
|
Plate 100 |
Plate 155 |
|
designed for all models (except the type VKU 33 - for the left bottom connection assembly) |
for all models without exception |
|
|
|
Selecting the “connecting piece”:
Depends on the type of fitting to connect the radiator.
| Connecting piece with inner threads G½ | Connecting piece with inner threads G¾ |
|
for fittings with external thread G½, e.g. shut-off fitting (if black steel pipe is used) |
for fittings with a sleeve nut (≈ G ¾ reduction to G ½) with internal G¾ thread, e.g. “H”* type compact fitting (when using copper, plastic or combinations of plastic and metal pipes) |
|
|
|
* 2 pcs of ½” reduction to ¾", which are necessary to connect radiators with connection fitting, to be only used when fixing the radiator.
Important for practice:
See instructions in using the mounting template
Towel Rail Radiators – KORALUX
How to correctly install a towel rail radiator to prevent corrosion?
Corrosion is not usually a question of the quality of the tubular heater, but the external environment acting on the surface of the heater (relative humidity in the room) and the location in the room.
For maximum corrosion protection it is necessary that ...
... The radiator is placed beyond the reach of the spraying water (this is primarily the area above the bathtub / shower - Zone 0 and 1).
Any warranty claims arising from corrosion or surface appearance changes cannot be therefore applied to radiators located within the reach of water spray or aggressive solutions.
(With combined or direct heating or tubular radiators it is essential that the outlet is located as far as in zone 3 (0.6 meters from the boundary of the bathtub or shower).
... the area where the radiator is located is sufficiently ventilated.
This means that adequate air exchange is provided. In such spaces, precipitation of moisture from the air in the form of condensate on cold radiators may easily occur, especially in turned-off and therefore cold heating elements. That condensed humidity may subsequently have an adverse effect on the surface of the radiator, causing corrosion in long-term exposure.
In the event that no regular ventilation, or no permanent air exchange, can be ensured, continuous operation of radiators needs to be ensured, in order to prevent the formation of cold areas in which the humidity will condense.
What is the difference between the various models of the KORALUX towel rail radiators?
- Naming the model LINEAR means that the horizontal tubes are straight
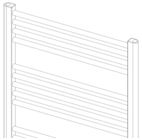
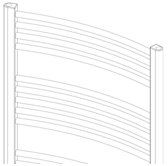
- Naming the model RONDO means that the horizontal tubes are curved
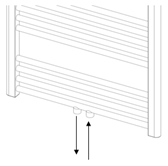
- Naming the model M means that the heater has also a central connection
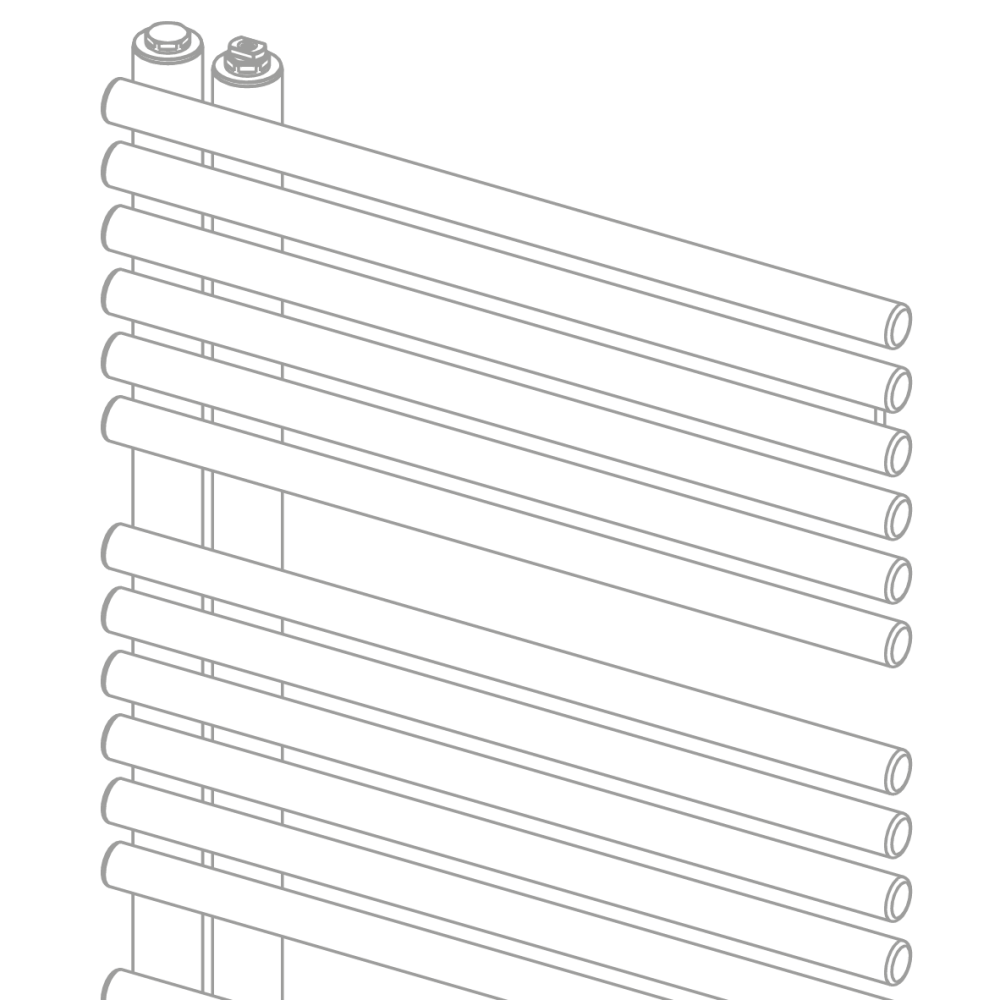
- The designation of the NEO model means that it is a single-sided tubular radiator
|
Model KORALUX |
Abbreviation |
Diameter of horizontal tubes [mm] |
Dimensions of steel D profiles [inch] |
Spacing (axial distance) of horizontal tubes [inch] |
|
|
LINEAR |
MAX |
KLM |
Ø 1 |
1 3/5 x 1 3/8 |
1 3/8 |
|
MAX - M |
KLMM |
||||
|
COMFORT |
KLT |
Ø 1 |
1 3/5 x 1 3/8 |
1 4/7 |
|
|
COMFORT - M |
KLTM |
||||
|
CLASSIC |
KLC |
Ø 4/5 |
1 4/7 x 1 1/6 |
1 4/7 |
|
|
CLASSIC - M |
KLCM |
||||
|
EXCLUSIVE - M |
KLXM |
Ø 6/7 |
1 4/7 x 1 1/6 |
1 4/7 |
|
|
RONDO |
MAX |
KRM |
Ø 1 |
1 3/5 x 1 3/8 |
1 3/8 |
|
MAX - M |
KRMM |
||||
|
COMFORT |
KRT |
Ø 1 |
1 3/5 x 1 3/8 |
1 4/7 |
|
|
COMFORT - M |
KRTM |
||||
|
CLASSIC |
KRC |
Ø 4/5 |
1 4/7 x 1 1/6 |
1 4/7 |
|
|
CLASSIC - M |
KRCM |
||||
|
EXCLUSIVE - M |
KRXM |
Ø 6/7 |
1 4/7 x 1 1/6 |
1 4/7 |
|
|
STANDARD |
KS |
Ø 4/5 |
1 4/7 x 1 1/6 |
3 1/7 |
|
